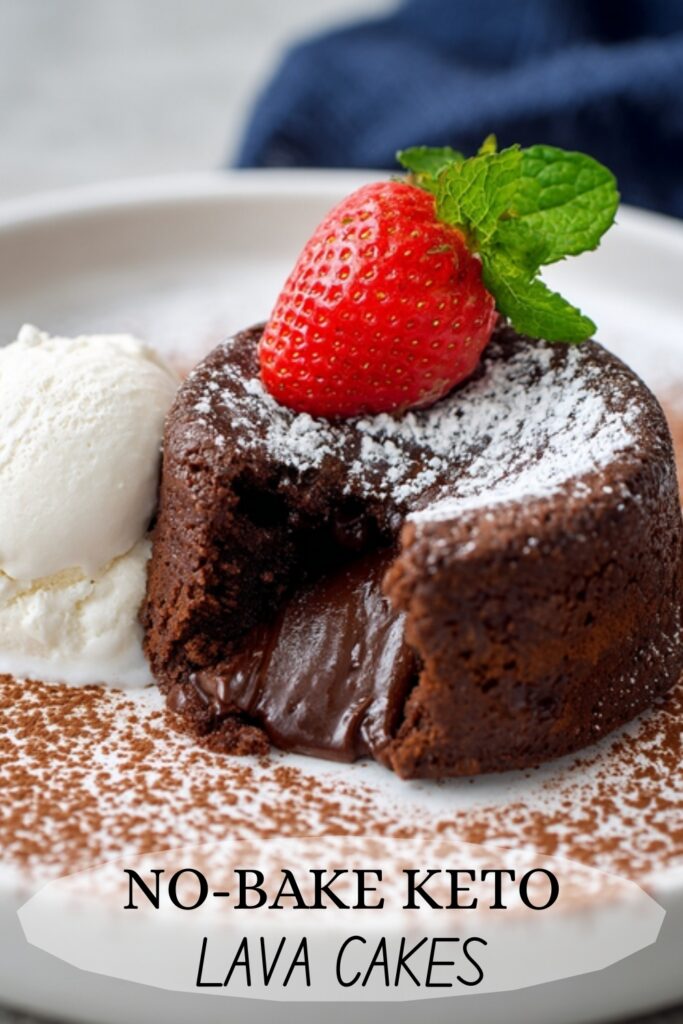
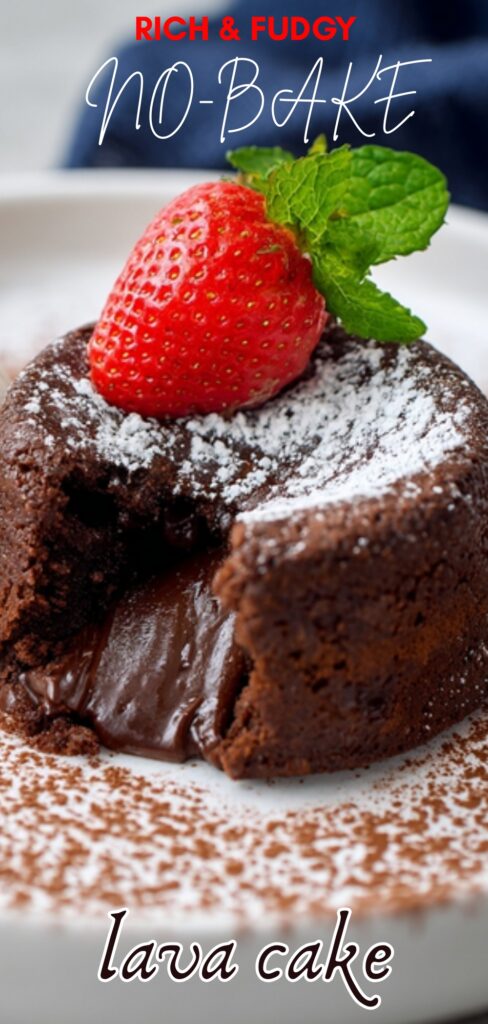
I’ll never forget the day this recipe was born. It was the middle of a sweltering July afternoon, and I had the most intense craving for a rich, decadent chocolate lava cake. The problem? The thought of turning on my oven and heating up the entire kitchen was absolutely out of the question. I was determined to find a way to get that gooey, molten-center magic without the heat, and after a bit of kitchen experimentation, this glorious no-bake version became my new obsession.
This is the dessert you need when you want to impress without the stress. It’s a showstopper for dinner parties, a romantic dessert for two (with delicious leftovers!), and the perfect treat for when you just need a serious chocolate fix.

Why This Recipe Is a Keeper
I could go on and on, but here’s why I know you’ll fall in love with this recipe too:
- Zero Oven Time, All the Glory: This is the ultimate appeal! You get all the decadence of a fancy dessert without heating your house. It’s pure, simple, mix-and-chill magic.
- Insanely Rich Flavor: We’re using high-quality dark chocolate, a hint of espresso to deepen the flavor, and a creamy mousse casing that’s perfectly balanced. That molten ganache center? It’s pure chocolate bliss.
- Surprisingly Simple: Don’t let the elegant final product fool you. If you can melt chocolate and whip cream cheese, you can absolutely master this recipe. There are no tricky baking techniques involved.
A Closer Look at What You’ll Need
The ingredients are simple, but using good quality ones will make all the difference.
- Dark Chocolate: Go for 85% cacao or higher. This gives the cakes a deep, complex flavor that isn’t overly sweet. Finely chopping it helps it melt smoothly.
- Full-Fat Cream Cheese & Butter: Make sure these are truly at room temperature! It’s the key to getting a perfectly smooth, lump-free mousse.
- Low-Carb Powdered Sweetener: A powdered monk fruit or erythritol blend works best because it dissolves seamlessly without any graininess.
- Unsweetened Cocoa Powder: This adds another layer of rich chocolate flavor to the mousse casing.
- Espresso Powder: This is my secret weapon! You won’t taste coffee, but it makes the chocolate taste more chocolaty. Trust me on this one.
- Heavy Whipping Cream: This creates that luscious, liquid “lava” center. You can use full-fat canned coconut cream for a dairy-free option!
- Fine Almond Flour: This gives the mousse a bit of structure without having to bake it.
Step-by-Step Guide to No-Bake Bliss
- Create the Molten Core. In a small saucepan, gently melt together 1.5 oz of the dark chocolate, the heavy cream, 2 tablespoons of butter, and 2 tablespoons of your powdered sweetener. Stir constantly over very low heat until it’s perfectly smooth and glossy. Don’t let it boil!
- Freeze the Centers. Pour that beautiful ganache into 5 silicone muffin liners. Pop them on a small tray and into the freezer for about 20-25 minutes. You want them to be solid little discs you can easily handle.
- Whip the Mousse. While the cores freeze, it’s time to make the fluffy casing. In a mixing bowl, beat the room-temperature cream cheese and the remaining 4 tablespoons of butter with an electric mixer until it’s light, airy, and completely smooth.
- Combine the Dry Stuff. In a separate bowl, just whisk together the rest of your powdered sweetener, cocoa powder, almond flour, espresso powder, and sea salt.
- Bring It All Together. Add the dry mixture to your whipped cream cheese base, mixing on low until it’s just combined. Now, melt the rest of your dark chocolate and fold it in with a spatula until the mousse is a uniform, decadent, dark brown. Try not to eat it all with a spoon!
- Assemble the Cakes. Pop the frozen ganache discs out of the silicone liners. Press about two-thirds of the mousse mixture into the bottom and up the sides of the empty liners to create little nests. Place one frozen ganache disc in the center of each one.
- Seal and Chill. Top each cake with the remaining mousse, making sure the ganache center is completely covered. Smooth the tops with a spatula. The hard part is over! Now, they just need to chill in the fridge for at least 2 hours to set up perfectly.
Expert Tips for Perfect Results
- Dairy-Free Swap: This recipe is super adaptable! For a dairy-free version, simply use your favorite plant-based butter, cream cheese, and full-fat canned coconut cream.
- Storage: Store any leftovers in an airtight container in the fridge for up to 4 days. They are fantastic the next day!
- The Big Secret: For the best “lava” flow, let the cake rest at room temperature for 5-10 minutes before serving. This softens the ganache center just enough to create that perfect ooze when you cut into it. If your mousse seems too soft during assembly, just chill it for 15 minutes before shaping.
Serving & Pairing Ideas
These cakes are a dream all on their own, but they’re also a perfect canvas for toppings! I love serving them with a few fresh raspberries or strawberries for a pop of color and tartness. A small dollop of whipped cream or a dusting of extra cocoa powder is also divine.
For pairings, you can’t go wrong with a strong cup of coffee or an espresso. It’s the perfect way to round out a dinner party or elevate a quiet evening at home.
No-Bake Chocolate Lava Cakes
Equipment
- 5 silicone muffin liners or a standard muffin tin
- Small saucepan
- Electric hand mixer
- Spatula
- 2 Mixing Bowls
Ingredients
Pantry & Sweeteners
- ⅔ cup powdered monk fruit/erythritol blend divided
- ⅓ cup high-quality unsweetened cocoa powder
- ¼ cup fine almond flour
- ½ teaspoon instant espresso powder
- ¼ teaspoon fine sea salt
Chocolate & Dairy
- 3.5 oz 100 g dark chocolate (85% cacao or higher), finely chopped
- 4 oz 113 g full-fat cream cheese, at room temperature
- 6 tbsp 85 g unsalted butter, softened and divided
- ¼ cup heavy whipping cream
Garnish (Optional)
- Additional cocoa powder or powdered sweetener for dusting
Instructions
- Prepare the Ganache Core: In the small saucepan, combine 1.5 oz (45 g) of the chopped dark chocolate, the heavy cream, 2 tablespoons of butter, and 2 tablespoons of the powdered sweetener. Melt over very low heat, stirring constantly until the mixture is completely smooth and glossy.
- Freeze the Molten Centers: Carefully pour the liquid ganache mixture evenly into the 5 silicone muffin liners (about 1.5 tablespoons each). Place the liners on a small tray and transfer to the freezer. Freeze for 20–25 minutes, or until the ganache discs are solid.
- Whip the Mousse Base: While the cores freeze, combine the softened cream cheese and the remaining 4 tablespoons of butter in a mixing bowl. Using the electric hand mixer, beat on medium-high speed for about 2 minutes until the mixture is airy, pale, and free of lumps.
- Combine Dry Components: In a separate bowl, whisk together the remaining powdered sweetener, the unsweetened cocoa powder, almond flour, espresso powder, and sea salt until thoroughly blended.
- Finish the Chocolate Casing: Add the dry ingredient blend to the whipped cream cheese mixture, mixing on low speed until just incorporated. Melt the remaining 2 oz (55 g) of dark chocolate in the now-empty saucepan over low heat until just melted. Pour the melted chocolate into the bowl and fold it through with a spatula until the color is uniform and rich.
- Assemble the Cups: Remove the firm ganache discs from the silicone liners and set them aside. Press approximately two-thirds of the chocolate mousse mixture into the bottom and up the sides of the same liners, forming a hollow nest. Place one frozen ganache disc into the center of each nest.
- Seal and Chill: Distribute the remaining mousse evenly, topping each cup to completely enclose the ganache core. Use a small spatula or the back of a spoon to create a smooth, flat surface.
- Final Set for Serving: Refrigerate the assembled cups for a minimum of 2 hours, allowing them to become fully firm. To serve, gently peel back the silicone liner. For the ideal molten effect, let each cup rest at room temperature for 5-10 minutes before plating. Dust with cocoa powder just before serving.
Notes
👨🍳 Chef Notes
Storage:
Leftover cups can be stored in an airtight container in the refrigerator for up to 4 days. They are best enjoyed after a brief rest at room temperature to soften the center.Ingredient Swaps:
For a dairy-free alternative, use plant-based butter, cream cheese, and full-fat canned coconut cream. Ensure the dark chocolate is also dairy-free.Troubleshooting Tip:
If your central "lava" isn't flowing, the cup is likely too cold. Let it rest at room temperature for an additional 5–10 minutes. If the mousse casing seems too soft to assemble, chill it for 15 minutes before forming the cups.Nutrition (per serving, approx.):
- Calories: 401 kcal
- Protein: 6 g
- Carbohydrates: 15 g
- Fat: 38 g (Saturated Fat: 22 g)
- Fiber: 5 g
- Sugar: 4 g
- Sodium: 206 mg
- Cholesterol: 75 mg
- Potassium: 313 mg
You Have to Try This One!
Seriously, this recipe is a game-changer for chocolate lovers. It’s become my go-to dessert for just about every occasion, and I have a feeling it will become yours, too.
I can’t wait for you to experience that first spoonful of rich mousse and warm, flowing chocolate lava. If you make these, please let me know or tag me in your photos—I’d love to see your creations! Enjoy!


