
Skillet Keto Triple Berry Cobbler (Just One Bowl)

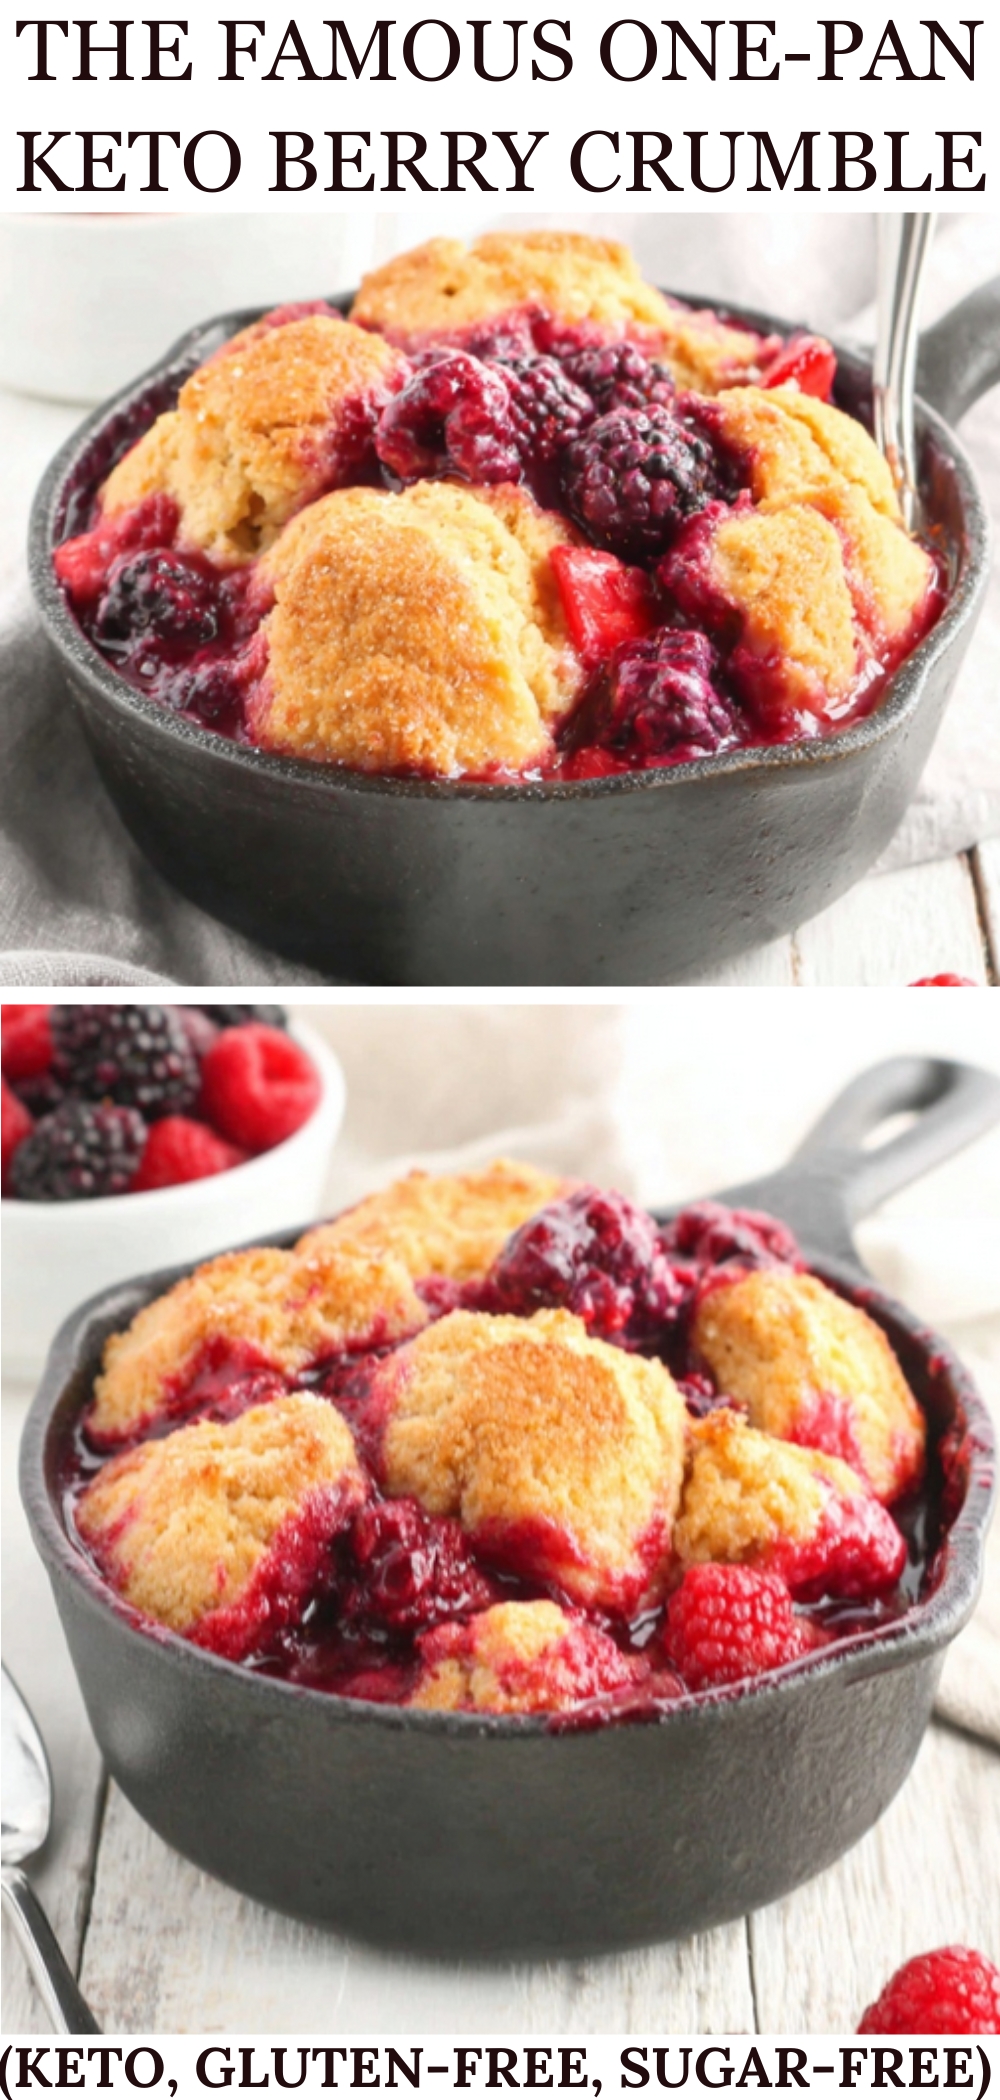
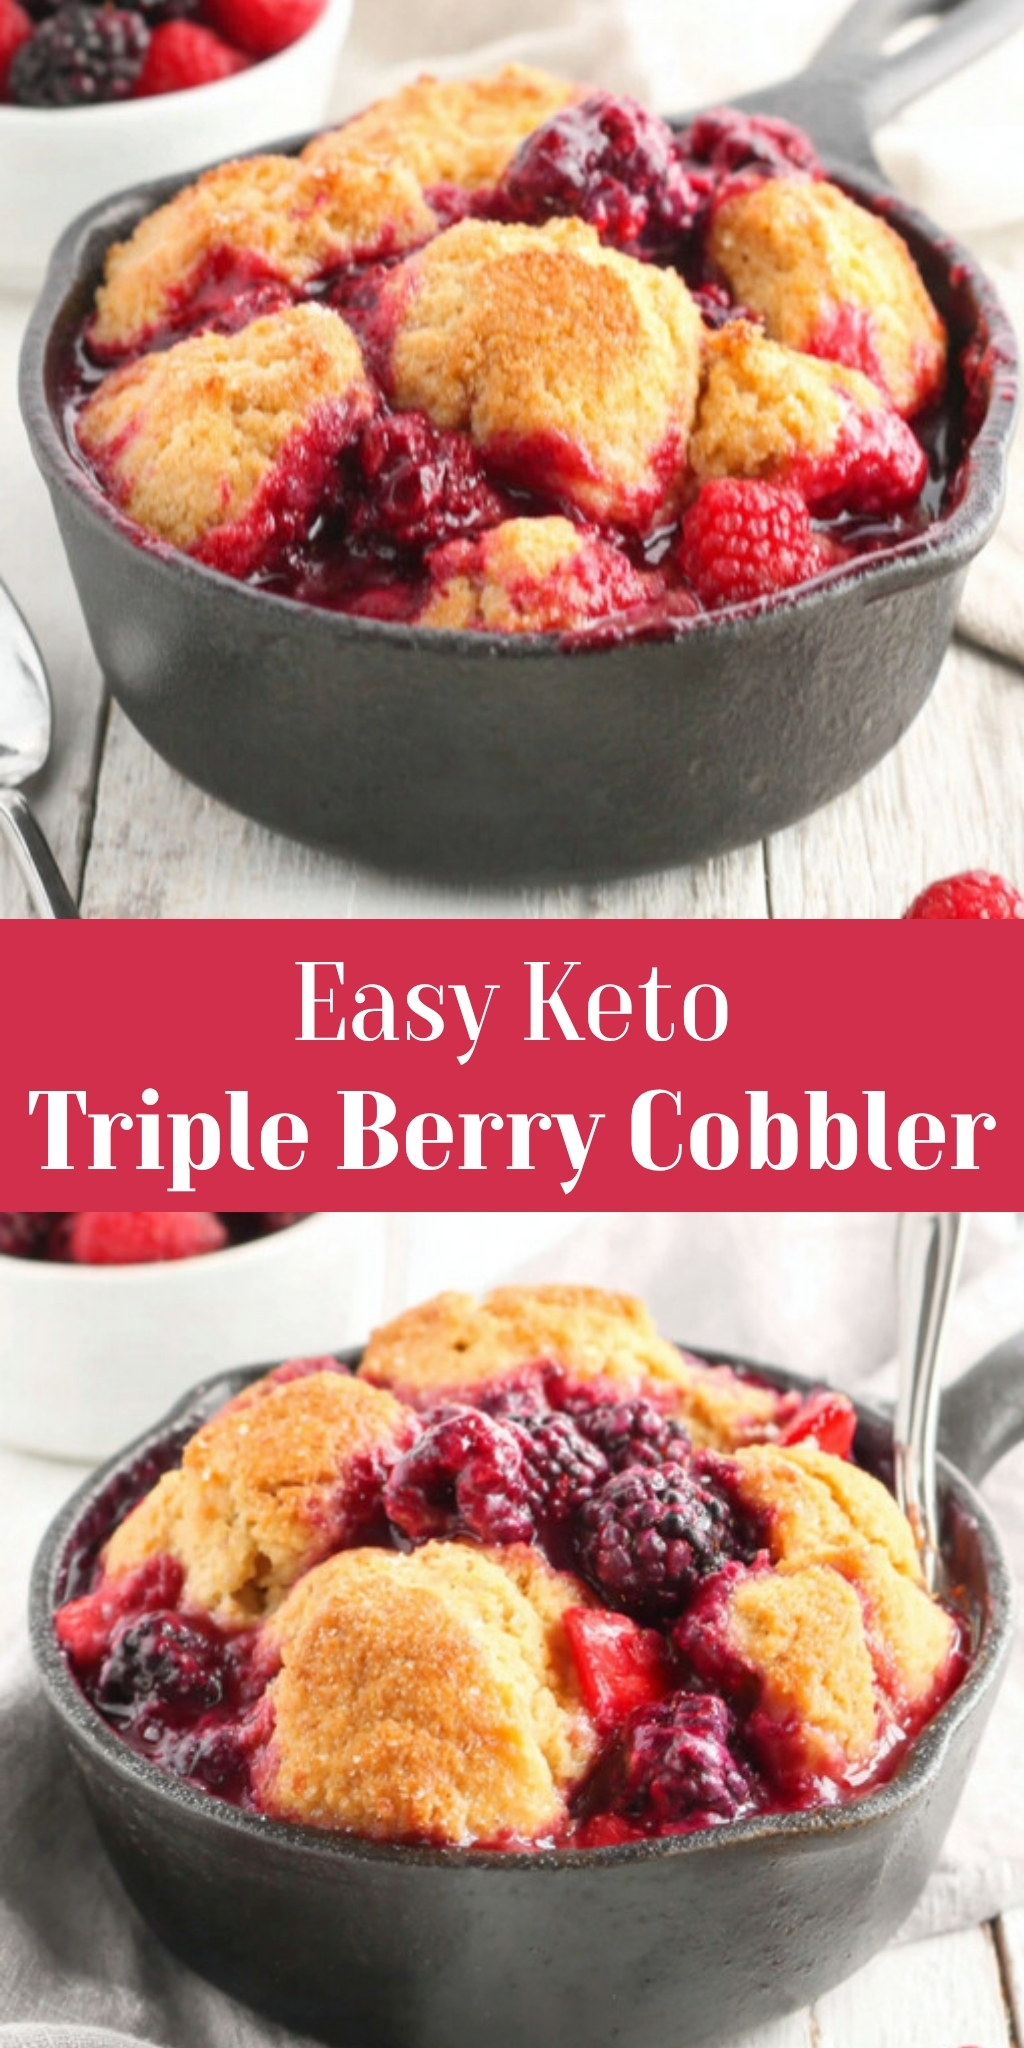
Making a keto triple berry cobbler doesn’t mean washing a pile of dishes. This single-skillet dessert delivers warm, bubbling berries under a crisp, buttery crust. I track my food data closely, and this low-carb recipe hits the mark without the extra cleanup.
 This post may contain affiliate links.
Why This Skillet Recipe Works
- Zero bowl transfer — You mix the biscuit dough directly in the cool skillet before adding the fruit.
- No-thaw frozen fruit option — You can use fresh summer berries or grab a bag straight from the freezer.
- Quick golden topping — A mix of almond flour and melted butter creates a firm, rustic crust without complicated pastry techniques.
By the Numbers: Low-Carb Nutrition
Many readers track what works for them, and this dessert fits easily into my daily limits. Here is a quick look at the math for one serving.
- Calories: 128
- Total Fat: 10 g
- Protein: 3 g
- Net Carbs: 4 g
Building Your Keto Triple Berry Cobbler
First, whisk the dry ingredients directly in your cool cast-iron skillet. Create a small well in the center to add your melted butter, egg white, and heavy cream. Stir everything with a fork until a cohesive dough forms.
Next, move the dough to a small plate so you can use the skillet for the fruit. If you prefer the efficiency of single-pan baking, my skillet brownie uses a similar prep method.
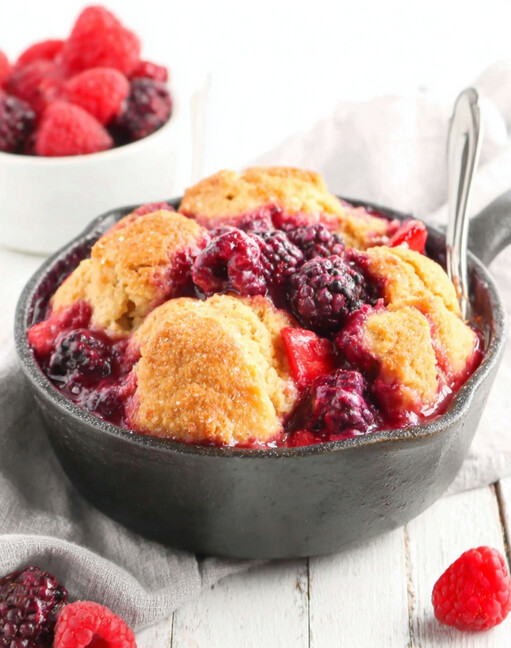
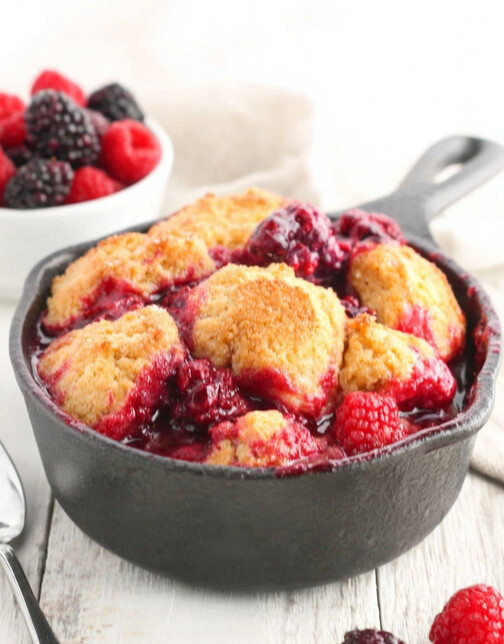
Toss your fresh strawberries, raspberries, and blackberries right in the same pan. Sprinkle the sweetener and xanthan gum evenly over the berries. This ensures the juices thicken nicely as they bake.
Break your reserved dough into walnut-sized chunks and scatter them over the fruit. Bake for 22–25 minutes at 375°F until the edges are thick and bubbling. Let the dessert rest for 10 minutes before serving so the filling can set.
Tips, Swaps, and Serving Ideas
- Fruit swaps: Blueberries or cherries work just as well as the triple berry mix.
- Storage: Keep leftovers covered in the refrigerator for up to 4 days. Reheat individual portions in the microwave for 30 seconds.
- Don’t worry if: The dough feels a bit shaggy in the skillet. Just gently press it into rustic clumps with your hands.
- Serving size: One generous spoonful pairs well with homemade keto vanilla ice cream for a balanced dessert.
- Skip the bake: If you want a fast raw treat instead, my keto cookie dough hits the spot without turning on the oven.
Quick FAQs
Can I use frozen berries?
Yes. Do not thaw them first, and add 5 to 7 minutes to your baking time.
Do I need a cast-iron skillet?
A cast-iron skillet provides the most even heat. If you use a glass baking dish, you will likely need to bake the cobbler a little longer.
Print
Easy One-Bowl Keto Triple Berry Cobbler
A vibrant medley of summer berries bubbles beneath a warm, buttery biscuit topping. This easy, low-carb dessert comes together in a single bowl for effortless indulgence.
- Total Time37 minutes
- Yield7 1x
Ingredients
For the Biscuit Topping:
- ½ cup superfine almond flour
- ⅓ cup golden monk fruit sweetener blend
- 1 tbsp coconut flour
- ¾ tsp baking powder
- ½ tsp ground cardamom
- ¼ tsp fine sea salt
- 3 tbsp unsalted butter (melted)
- 1 large egg white
- 2 tbsp heavy whipping cream
- ½ tsp vanilla extract
For the Berry Filling:
- 3 tbsp granular monk fruit sweetener
- ¼ tsp xanthan gum
- 1 cup fresh strawberries (hulled and quartered (about 5 oz / 140 g))
- 1 cup fresh raspberries (about 4.5 oz / 125 g)
- ⅔ cup fresh blackberries (about 3.5 oz / 100 g)
Instructions
- Oven & Skillet Prep : Position a rack in the center of your oven and preheat to 375°F (190°C). Place your 9-inch cast-iron skillet on the counter to use as your single mixing vessel.
- Mix Biscuit Base : Directly into the cool skillet, add the almond flour, golden monk fruit sweetener, coconut flour, baking powder, cardamom, and salt. Whisk briefly to combine and break up any clumps.
- Form the Dough : Create a shallow well in the center of the flour mixture. Pour in the melted butter, egg white, heavy cream, and vanilla extract. Use a fork to stir the wet and dry ingredients together until a shaggy, cohesive dough forms.
- Isolate the Topping : Using your hands, gather the dough into a rustic ball and transfer it to a small plate or a piece of parchment paper. Set it aside for a moment. A few crumbs left in the skillet are perfectly fine.
- Create the Berry Filling : Without wiping the skillet, add the fresh strawberries, raspberries, and blackberries. In a tiny bowl (or just sprinkled carefully), combine the granular sweetener and xanthan gum, then sprinkle this mixture evenly over the berries. Gently toss everything together until the berries are lightly coated. Arrange them in an even layer.
- Assemble the Cobbler : Break the reserved biscuit dough into small, walnut-sized chunks. Scatter these pieces evenly over the surface of the berry filling. Don't press them down; let them rest on top.
- Bake to Golden : Transfer the skillet to the preheated oven. Bake for 22–25 minutes. The cobbler is ready when the berry filling is bubbling thickly at the edges and the biscuit topping is firm and a deep golden-brown.
- Rest and Serve : Carefully remove the hot skillet from the oven and place it on a heat-proof surface or wire rack. Allow the cobbler to rest for at least 10 minutes; this helps the filling set. Serve warm, perhaps with a scoop of low-carb vanilla ice cream.
Notes
- Storage: Leftover cobbler can be covered and refrigerated for up to 4 days. Reheat individual portions in the microwave for 30–45 seconds or in a 300°F (150°C) oven until warm.
- Berry Variations: This recipe is fantastic with blueberries or cherries. If using frozen berries, do not thaw them first, and anticipate needing an additional 5–7 minutes of baking time.
- Sweetener Note: The golden monk fruit sweetener adds a caramel note to the topping, but regular granular sweetener will also work. Adjust the amount based on the natural sweetness of your fruit.
- Pan Choice: A cast-iron skillet provides excellent, even heat and a rustic presentation. If using a glass or ceramic baking dish, the cooking time may be slightly longer.
Nutrition Facts (per serving): Calories: 128 | Total Fat: 10 g (Saturated Fat: 5 g) | Total Carbs: 7 g (Fiber: 3 g, Net Carbs: 4 g) | Protein: 3 g | Sodium: 148 mg
These values are approximate and may vary based on ingredients and preparation.
- Prep Time: 12 minutes
- Cook Time: 25 minutes
- Category: Dessert
- Cuisine: American
Nutrition
- Calories: 128
I hope this easy dessert simplifies your meal prep this week. How did your body respond to this almond flour and berry combination?
Just a home cook sharing the data and recipes that work in my kitchen — not a nutritionist. Always check with your doctor before making dietary changes.
")

